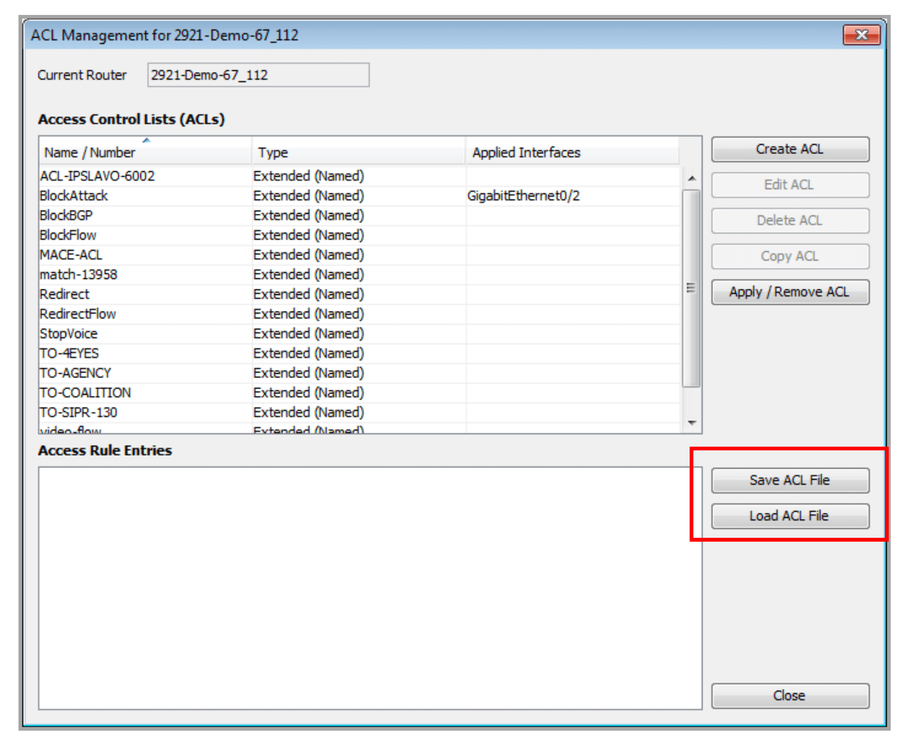
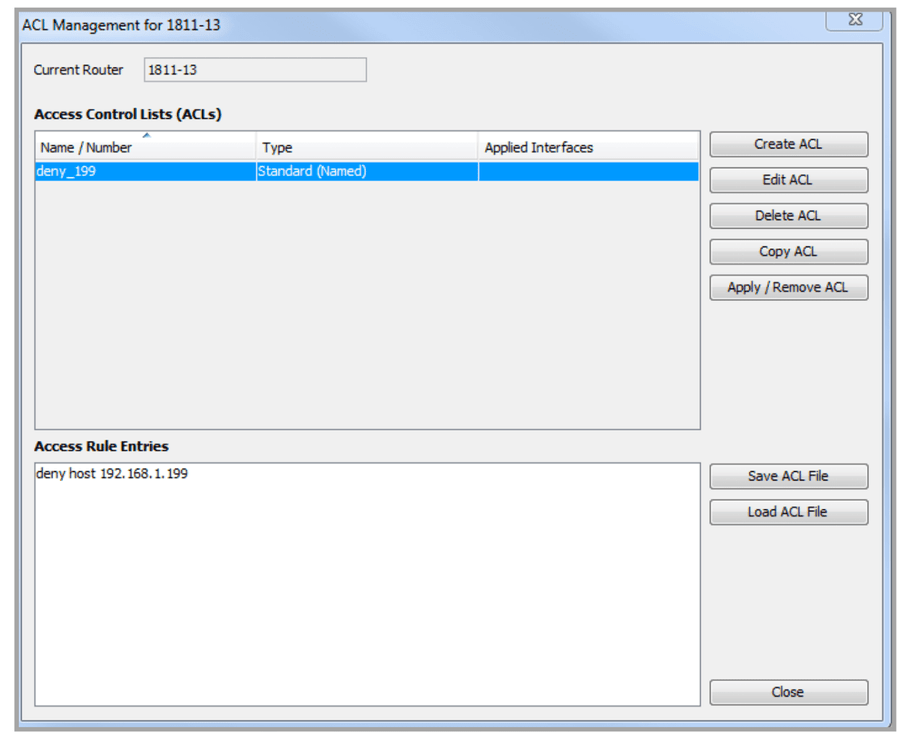
Managing ACLs
LiveNX includes an Access Control List (ACL) editor that allows you to edit and create ACL rules for use with QoS match capabilities. The ACL editor also provides an option to save and load ACLs from a file. The ACL Management dialog box can be accessed from Tools > Manage ACLs.
To create an ACL, click on Create ACL.
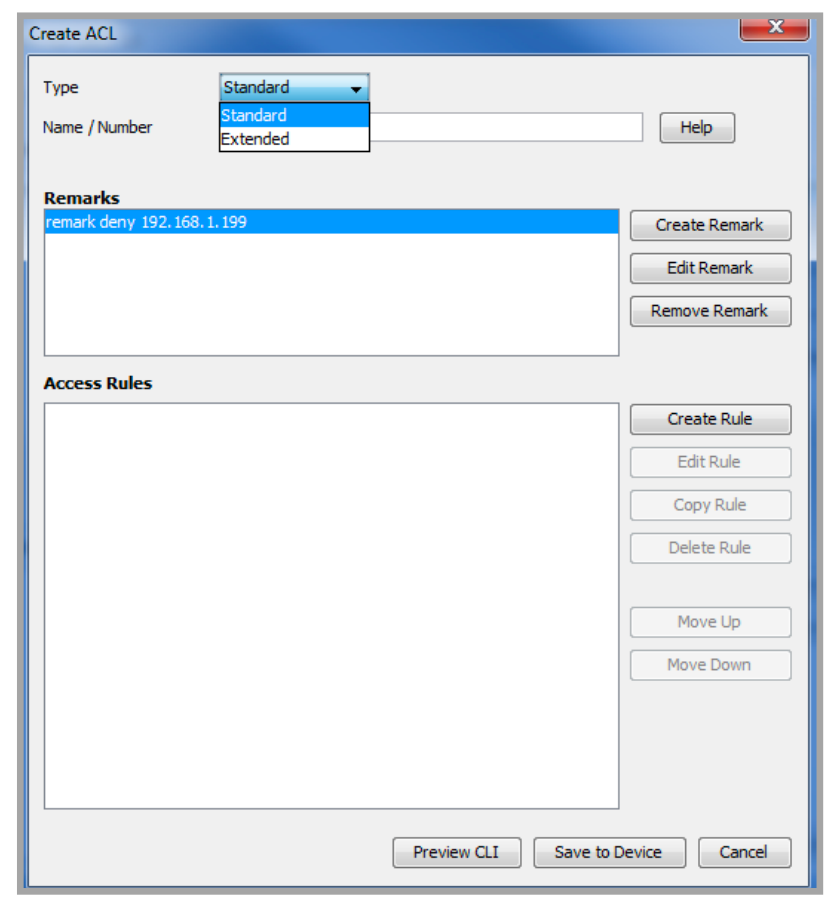
Choose between Standard or Extended. Standard uses ACL numbers between 1-99 or 1300-1999. Extended uses ACL numbers between 100-199 or 2000-2699. Alphanumeric characters are allowed in the Name/Number field with no blank spaces.
Click on Create Remark to create a remark for the ACL.
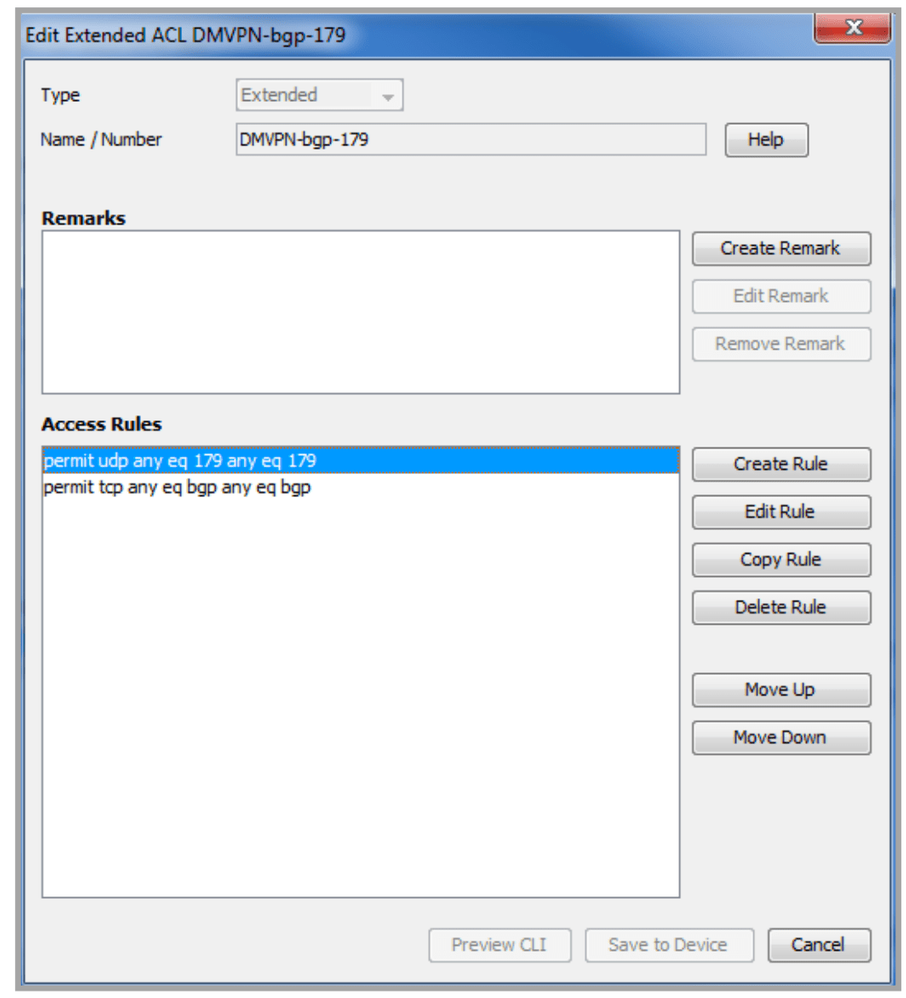
Click on Create Rule to create access rules to allow or to deny a particular IP address. Two windows are available to create or to edit rules, depending on whether a Standard or an Extended ACL was created.
For the standard ACL rule, create a rule by selecting permit or deny, and selecting the desired source IP address for this rule.

For the extended ACL rule, additional selections are available. In addition to permit or deny, other selections include protocol (IP, TCP or UDP), Object-Group or by IP protocol name (ahp, eigrp, esp, gre, icmp, igmp, ip, ipinip, nos, ospf, pcp, pim tcp or upd) or IP protocol number.
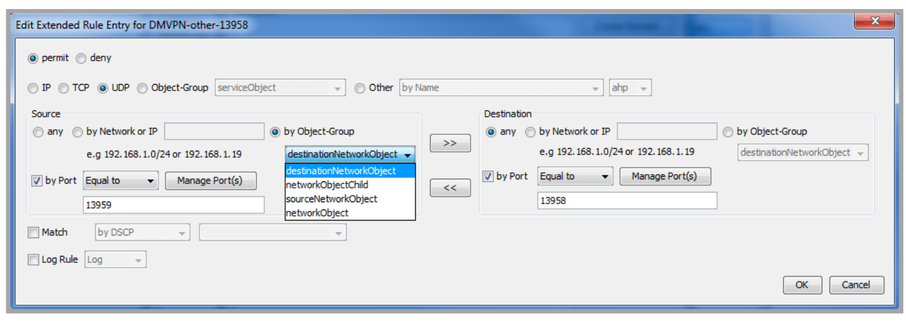
LiveNX reads the Object-Group information already created in the device configuration and displays any available selections through the drop-down.
The by Port selection is available if either TCP or UDP is selected. Options are equal, not equal, greater than, less than or between. The Manage Port(s) button provides a list of commonly used ports. Different rules can be created for Source and Destination. Use the >> if you would like to copy the Source parameters to the Destination side and use the << if you would like to copy the Destination parameters to the Source side.
Click on Match to select traffic based on DSCP or on IP precedence. Default is off.
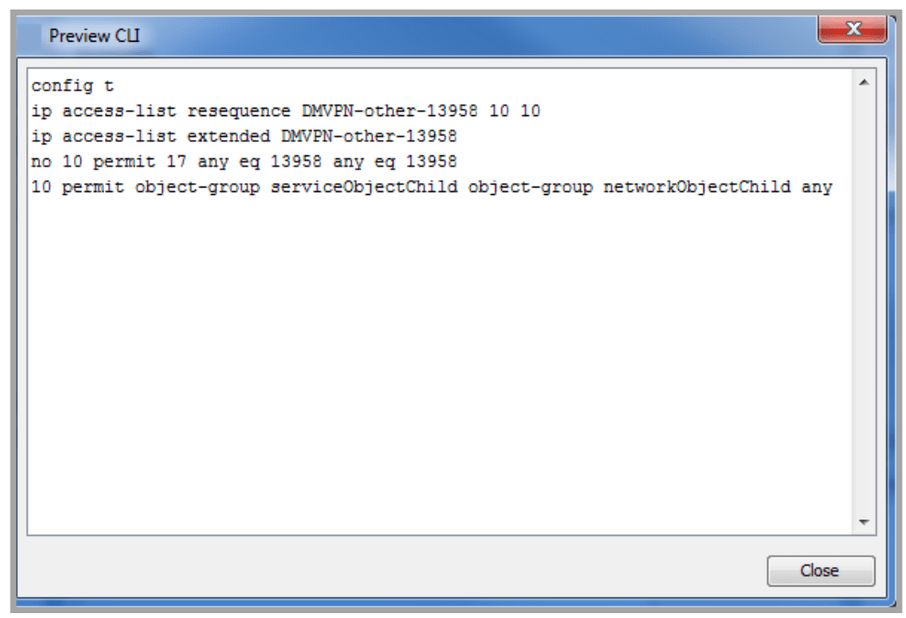
Click on Log Rule and select either Log to Log matching packets or Log Input to Log the ingress interface and source MAC address, in addition to the packet’s source and destination IP address and ports. Default is off. Click on Preview CLI to see the commands in CLI format prior to saving it to the device. Click on Save to Device to transmit the CLI commands to the device. Click on Cancel to close the window without making a change to the ACL rules.
Once a rule is created for the ACL, highlight the rule to edit, copy or delete the created rule. Repeat the Create Rule to add additional access rules for a given Access Control List. Rules are executed in the order from the top down, so highlight a rule in the list and use the Move Up or Move Down button to reorder the rules in the Access Rules window.
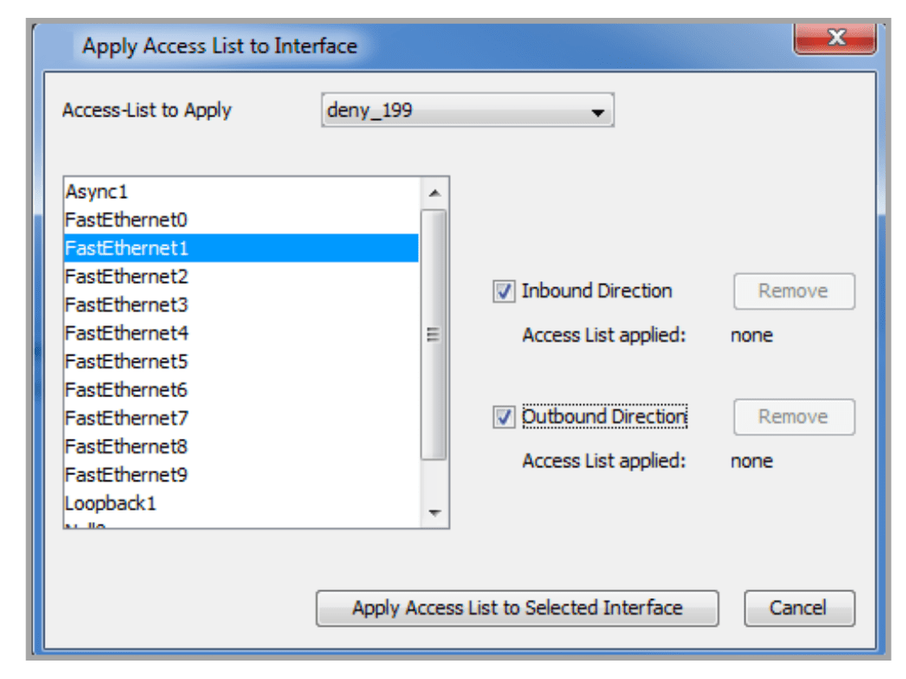
Once the Access Control List is saved to the device, click on Apply/Remove ACL.

The Apply Access List to Interface window automatically lists all interfaces on that device. Click on the desired interface to apply the interface to, select Inbound Direction and/or Outbound direction and click on Apply Access List to Selected Interface to designate the desired ACL. The UI will ask if you are sure before modifying the interface configuration.
For a QoS policy that uses an ACL as part of its class definitions, the ACL will automatically be included when loading and saving QoS policy files; it is not necessary to load and save the ACL file separately.
To load an ACL file from one device to another, save the ACL to a file and then open the editor on the target device. Then, load the ACL file and save it to the device. LiveNX will warn if there are any conflicts.